THE VIDEO HARVEST GUIDE
From folder to found.
Set up your Mac, harvest the details, and find the moments worth using.
For Video Harvest 0.6.3 • Updated 9 October 2026
In this guide
Before you start
You’ll need an Apple silicon Mac, macOS 14 Sonoma or later, footage, internet access and your own OpenAI or Google Gemini API key for new AI processing. A valid app licence is required where applicable. AI usage is billed separately. Saved logs can be searched without fresh analysis.
STEP 01
Activate your Mac
Open Licence, enter your purchase email and Lemon Squeezy licence key, then choose Activate this Mac. Keep keys private. Deactivate before moving to another Mac; Forget does not release an activation.
STEP 02
Add your AI key
Open AI Settings, choose OpenAI or Google Gemini, paste the matching API key, keep a supported analysis model and choose Save settings. Separate provider keys are saved in Mac Keychain. Changing provider retains your logs and does not analyse footage automatically. API access is separate from chat subscriptions.
Start with 16 balanced frames and a few clips. Check provider usage before processing large batches.
STEP 03
Choose your footage
Use Local for footage on your Mac or external drives, or Drive for a Google Drive folder available in Finder. Choose Open folder. Each source remembers its separate library. MOV, MP4 and M4V containers are supported; playback depends on the media. Start small. Your originals remain untouched.
STEP 04
Harvest the details
Select recordings, then choose Analyse selected. Representative frames generate draft descriptions, keywords and timestamped observations. Watch the status and any errors. More > Extract frames only creates previews without AI.
Analysis sends sampled preview images, timestamps and technical metadata to your chosen provider—not original videos or local paths.

STEP 05
Bring dialogue into the picture
Select clips, choose Transcribe selected and review Dialogue. Include dialogue in analysis lets speech inform the analysis. Temporary audio sections go to your chosen provider. Timings are estimates—listen before editing.
STEP 06
Find the useful moments
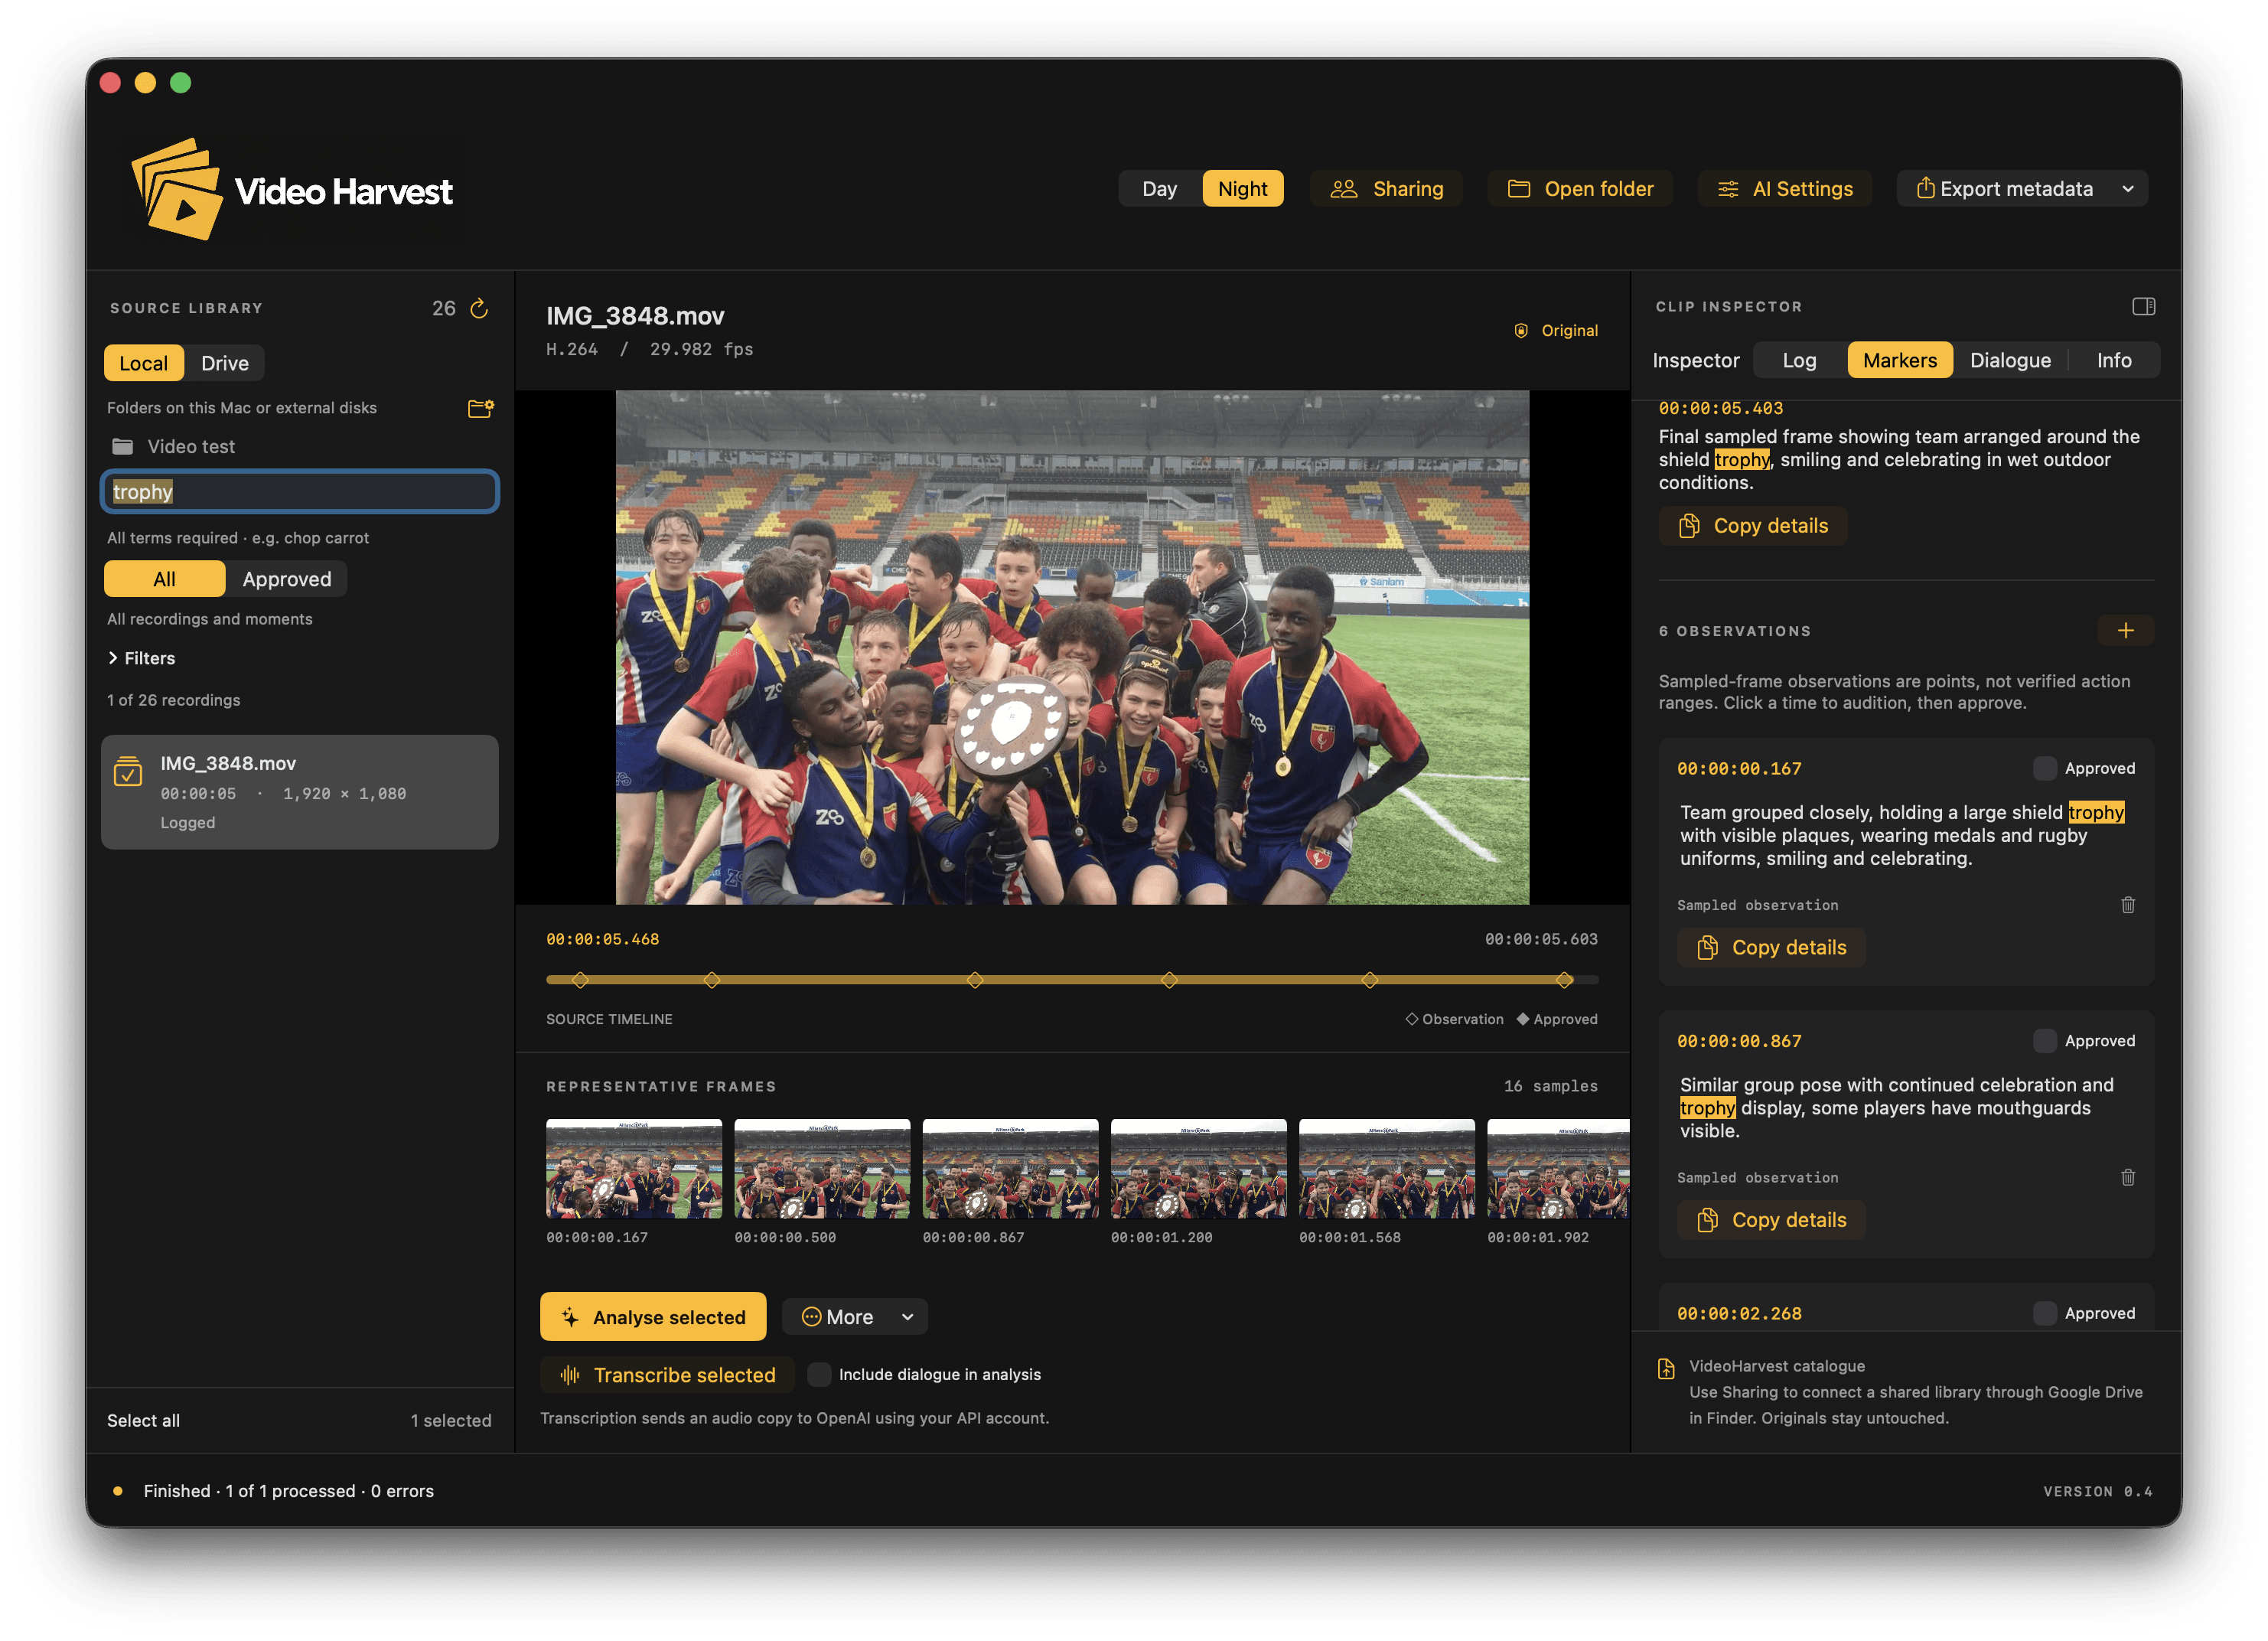
Search for subjects or actions such as rugby, cowboy or someone chopping carrots. Natural expands related English vocabulary in saved logs; Keywords requires literal terms and supports quoted phrases. Search explores your saved catalogue, not unseen footage.
Choose Local or Drive, then use Sort and Filters for folder/project, duration, orientation, visual analysis and filming date. Switch between All and Approved. No results? Clear filters and confirm that your footage has been analysed.
STEP 07
Review and approve
Click matching timestamps in Log, Markers or Dialogue to review the source. Tick Approved after checking. Sampled observations are points, not verified action ranges; brief events may be missed. Copy details copies useful text and its timestamp.
STEP 08
Share your catalogue
Google Drive for desktop handles sign-in and syncing. Choose a Drive or Shared Drive folder in Finder and use Sharing to connect the library. Teammates need access to the same library on their Macs.
Search existing logs without downloading every video; playback or analysis may download the selected clips. Let syncing finish and avoid simultaneous edits to the same catalogue item.
STEP 09
Export your metadata
Choose Export metadata, then Selected clips as JSON/CSV or All clips as JSON/CSV. CSV is useful for spreadsheets; JSON preserves structured data. These exports contain metadata, not edited video. Day/Night changes appearance, not your library.
A few quick checks
Key errors
Check your provider and matching API key, API billing or quota, and internet connection. Never email your keys.
Missing results
Check the correct library, switch to All, clear filters and confirm you analysed the footage first.
Cloud-only footage
Allow Google Drive for desktop to download the selected clip before playback or analysis.
Licence or activation
Check your purchase email and licence key, internet access and any activation on another Mac.